Wednesday, October 24, 2012

Paper peacock

 There is always a time when you wish to create something new and you can find no crafting material at home.That's when paper comes in handy. I always enjoyed creating stuff out of paper. Be it origami or just paper cutting. 

 This peacock made by my mom is created with plain white paper and a few sequins. The basic shape of the peacock was initially cut out. You need some kind of a base/ background for your artwork. Mom chose a board of thermocol and pasted red wrapping paper on it. 
 

 Choose a background suitable for your design. If your artwork is intricate and you chose a background with a lot of detail, they will blur each other out. Cut out the branch and place it on the background. Now cut the peacocks body. Play around with the placement until you are satisfied. Now stick them to the background. The details in the peacocks body are done with the round pieces of paper that come out of a paper punch. Glue the round pieces of paper on the body. Cut out pieces of paper in the shape of feathers, leave some space in the middle. Again, play around with placements until you are satisfied, then glue the feathers. Once all the tail feathers are in place, cut thin strips of paper and glue them connecting the tail and the body. To add drama to the picture , add a few sequins to the branches, in between each feather and on the crown of the bird.  Aaaaaaaaaand we're done!!

 Though it's time taking, you get some stunning pieces of art with this technique. 

Tuesday, October 2, 2012

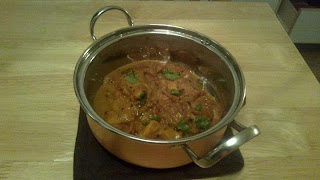
Fried lamb

I know, I know, I make this look like a cookery blog, but I managed to find some time today, so here you go.
Today's recipe is a delicious lamb fry, one of my favourites. This dish needs some patience to make but the wait is worth it. For this dish..

You will need


Lamb , cleaned and cut into bite sized pieces
Curd 1/2 cup
1/2 lemon juice
Ginger- garlic paste 1 Tbspn
Corriander leaves - Finely chopped
Mint leaves - Finely chopped
Slit green chillies 2-3
Onion, finely sliced 2
Jeera (Cumin) powder - 1 tspn
Corriander powder - 1 tspn
Salt to taste
Red chilli powder 1 tspn
Garam masala powder 1 tspn
Oil


The method:


Clean the lamb and cut into bite sized pieces. Marinate the lamb with Curd, lemon juice, ginger- garlic paste, Corriander leaves, mint leaves, salt, green chillies, and Red chilli powder.

Marinade this mixture for 2 hours. Heat some oil in a heavy bottomed pan. Once the oil is hot, add the onions. Keep stirring until the onions are golden brown. Now add the corriander and cumin powders. Now add the marinated lamb pieces. Keep stirring until the lamb has slightly changed color. Cover the pan and cook on medium heat. Keep stirring in between to avoid burning the lamb. Stir until the lamb oozes oil. Once the pieces are dark brown, not burnt, sprinkle the garam masala on top. Stir for a couple of minutes. The lamb is ready to eat. Tastes great with roti and rice.


Sunday, September 9, 2012

Hornet stings - Home remedies

Last week as I was travelling home by train, I experienced a stinging pain on my wrist. When I lifted up the sleeve I saw a bee like insect stinging me on my wrist. I brushed the insect off my sleeve but had no idea how to reduce the unbearable pain or the swelling which was increasing by the minute. The half hour journey home felt like a few hours. That evening, I did some research about stings,and found a lot of useful information.I thought it would be a good topic to blog about.

Firstly, I found out that the insect which bit me is called a hornet. The hornet is from the bee family, closer to the wasp as it does not leave it's stinger behind. This means it can bite you again and again. That makes it more dangerous than a bee. The first thing you do when a hornet stings you, or even when you see one around you is get away from there.

Hornet stings contain poison, but it is usually quite small in amount.Unless you are allergic to wasp venom, the hornet's sting is not lethal. It would take about 500 hornet stings to kill a human child and 1000 to kill an adult. Also the hornet sting contains 5% acetylcholine. This is known to send pain signals to the brain. Hence the sting of a hornet is way more painful that that of a bee.

Let's talk of the remedies now:

Step 1: Get away from the hornet first. There may be more around or the same insect may return to bite you.
Step 2:  Check for the stinger. This usually does not happen but the hornet may leave a stinger on you. Check for a black stinger. DO NOT use tweezers. They may send the stinger further inside and increase the chance of venom getting in you. Use a sharp object or the edge of a credit card to slowly graze out the stinger
Step 3 : Work on reducing the swelling and numbing the pain. An ice cube can be put to use here. Apply an ice pack or ice cube wrapped in a cloth. This reduces the swelling to a great extent.

DO remember that the pain might take a few hours to reduce. If you feel that the swelling or pain is too much then it is good to get to the emergency room.

 Some more home remedies

A topical pain killer or pills like ibuprofen would work, but consult your physician before taking these.
A thick paste of baking soda applied on the sting/ swelling would reduce pain considerably.
Soak a small cloth in Apple cider vinegar or plain vinegar and apply to the sting until pain reduces.
The same thing can be done with lemon juice too
A freshly cut piece of potato, onion or cucumber held on to the sting reduces the pain
Olive oil can also be applied
Crushed parsley leaves applied topically also provide great relief

The next time some one around you gets stung by a hornet, you know what to do. Always remember to stay away from hives. It's better to be safe than sorry.

Tuesday, August 14, 2012

Chepala pulusu (Fish curry Andhra style)


 I have always loved eating sea food. My parents are from coastal towns and I seem to have inherited this love of sea food from them. One of my favourite dishes is chepala pulusu. Pulusu is a tamarind based curry. This dish is made in different ways across andhra. What I will blog today is the way it is made at my place.

 I am not much of an expert at selecting fish, but my mom says river fish taste great with pulusu. After living out of India for so long, I pick up whichever fish I can get in the frozen food aisle at the super market.

 To make the pulusu you need

Any river fish , 1/2 kilo ,Cleaned and cut to 2.5 - 3 inch pieces
Onions - 2 big, finely chopped
1 Tomato - pureed
3 green chillies, sliced
Tamarind - the size of a small orange
Ginger- garlic paste 1 tspn
Salt to taste
Red chilli powder to taste
Dhaniya (Corriander seed) powder 1/2 tspn
Jeera (Cumin seed) powder 1/4 tspn
Corriander leaves 1/4 bunch, chopped
Garam masala 1/4 tspn
Sugar a pinch
Oil 1-2 Tbspn

Seasoning:
Mustard seeds 1 tspn
Curry leaves 6-7
Green chillies 3 , sliced
Methi (fenugreek) seeds 5-6

The method:
Soak tamarind in water for a few minutes. Take pulp of the tamarind and keep aside.
Apply salt,red chilli powder, dhaniya powder, and jeera powder to the fish and keep aside. If you are worried that the fish might break while cooking, heat the oil in a pan, and lightly roast the fish for a few seconds, remove and keep aside.

In the same pan, add the mustard seeds, after they begin to splutter, add the curry leaves, slit green chillies and methi seeds. Add the chopped onions, stir until transparent. Now add the ginger garlic paste,keep stirring, do not let it burn.

Add the fish pieces to the pan, add the tomato puree, do not stir or the fish might break. Cover the pan and cook at medium heat for 1-2 minutes until the puree is cooked. Now filter the tamarind pulp and add the liquid. Cover the pan and cook at medium heat for 3-4 minutes. Remove the lid and add the garam masala, sugar and carefully shake the pan to allow the masala to mix in the curry. Now add a little red chilli powder, dhaniya powder, jeera powder and salt, shake again. Add the remaining green chillies (you can add one if you do not like spice), corriander leaves. If you feel the curry is too thick for your liking, add a little water to dilute. Cover the pan and cook on low heat for 10-12 minutes.

This tastes great when served with hot rice.

Thursday, August 2, 2012

Anupama Rao - Talent of the week

 I mentioned in an earlier post that I do not have to look far while scouting for talent. How true!! This weeks talent is Anupama Rao, who is family. Anupama is a jewelry designer based in New Jersey.

  Anupama has been designing jewelry as a hobby since a long time. However she started designing for personal and commercial purposes about three years ago.  To improve her craft and to master the finer techniques used in stringing, beadwork & beadweaving, all Anupama needed was a week's training.

 She says she is inspired by the environmental conditions around her and sometimes even by the feedback of her friends and customers about her pieces. Not all her work stems from inspiration, some pieces just come to life in her hands or some fun with colours may turn out a into a beautiful piece.

Anupama's favourite style to work with is stringing/beadwork mainly using beading wire or artistic craft wire & chains. She says she is not a fan of beadweaving but does use the technique when the piece calls for it.

 Anupama extensively uses Crystals (Swarovski, Czech & Celestial) & Pearls (Swarovski, Czech & Cultured Freshwater) in her work as she loves these kind of beads. Below is one of her creations with this material


Till today Anupama has created necklaces, earrings, bracelets, bookmarks, anklets, watches, and eyeglass holders. Her pieces are customized based on what her clients want.

When we asked Anupama about her plans for the future she said "I'm not looking at my jewelry-making expertise as my source of income in the long run, but mostly as a medium of sharing my creativity with others around me & as a de-stresser, besides being busy with my other day jobs & chores."

If you want to get customised jewelry, now you know where to go :)

Wednesday, August 1, 2012

Painting on Glass

Glass painting is one of the easiest forms of painting where your sense of colour plays a stronger part than your painting technique.
There are many types of colours available in the market but the easiest to use are the water based tubes used with a liner tube.

To paint , clean the glass well so that there are no traces of oil or dust. Lay the glass on a plain table , place the design under the glass. Trace the outlines of the design with the liner. Allow the liner to dry for a few hours. The liner stops the colors from flowing out of place.

Once the liner dries start filling the colours in place. Squeeze the tube gently and avoid air bubbles. Once the design is complete, leave aside to dry. Once the painting is dry, turn it around and display

The same techbique can be used on projector plastic sheets. Instead of using the liner, a marker pen can be used.

Tuesday, July 31, 2012

Vegetable Manchurian- Dry

 Most people I know love Chinese food. But, I wonder how many of them ever had Indo-Chinese food. Indo Chinese is the Indianised version of Chinese dishes mostly sold by street vendors but also available in many restaurants. Many Indians believe this is authentic chinese food. Show it to a Chinese and he would probably not recognize the dish at all.

 One of my favourite Indo- Chinese dish is Vegetable Manchurian. There are two versions of this dish, wet and dry. Today I will post the recipe  for Dry Vegtable Manchurian.

 For this you will need :


  • Grated Cabbage 1 Cup
  • Grated Carrot 1 Cup
  • 1 Stalk Chopped Spring onion
  • 2-3 Chopped Green Chillies
  • 1 Tbspn Corn Flour
  • 1 Tbspn Soya sauce
  • 1 Tspn Pepper Powder
  • 1 Tbspn Garlic Flakes
  • A pinch of ajinomoto
  • Salt to taste
  • 1 Tspn sugar
  • Oil 

Method :

Squeeze out the water from the grated cabbage and carrot and mix them well. Ensure that most of the water is out or else it will be difficult to keep the shape intact. In a mixing bowl, add the squeezed carrots, cabbage, corn flour , salt and green chillies. Mix well.
Make small balls out of this mixture. There will be no need to add any water to this mixture. I usually make fist sized balls as I have super tiny hands, the usual size is about that of a kofta.
Heat oil in a wok and deep fry the balls until golden brown. Drain and take out into a tissue lined bowl to absorb excess oil. Keep aside.
Heat another pan and add 2 Tbspn oil. Saute the Garlic, some more green chillies, ginger and spring onions and stir fry for a few seconds. Add the vegetable balls and stir fry for a few minutes. Reduce the heat to medium and add soy sauce and sugar. Mix well and cook for two minutes.
Garnish with spring onions and corriander


Wednesday, July 25, 2012

Pot/Vase paintings

 When I was in college, I had a fetish for pots and vases. I used to collect containers of various sizes, shapes and materials and turn them into vases.

Here's a collection of a few vases I had made during those years.

 Marbling has always been one of my favourite techniques of painting terracotta pots. This technique is so called because the final effect reminds us of the patterns on marble stones. I use oil paints while painting terracotta pots as it adheres well to the surface. In the above picture there are two pots that have been painted with this technique. The first one from the left has been painted in blue on a base coat of white, giving it a porcelain effect. The second one from right has been painted brown on a base of yellow, giving it a more earthy feel. For this technique, paint a terracotta pot with more than one coat of paint for the base color. Leave a time gap of a few hours between the coats. Leave to dry, Once the pot is completely dry, fill a container big enough for the pot to submerge in it. Add a few drops of contrasting oil paint to the water. Swirl the water , submerge the pot in the water and swirl it in the direction of the water. An elegant yet abstract pattern is formed on the water.

 The second technique that I have used is embossing using dough/clay. On the second basket from left and the third pot from right, this technique has been used. Here I have used epoxy putty to make various fruits: I mix both the pastes in the epoxy putty kit and mould it into strawberries. These strawberries have been stuck on to the middle of the basket . A few grooves have been made in the mould to represent the seeds of the strawberries. Similarly bananas and cherries have been made for the pot. This has to be done very quickly as epoxy putty dries at room temperature. Once this dries paint the basket/ pot with a base color and pain the fruits as well.

Another favourite vase of mine has been bamboo. I used to cut bamboo poles to 12-10 inch pieces.  These bamboos can be painted with various techniques.

One more technique is the flow technique. I mix a little glue to a color contrasting to the base coat. I drip a little color on the pot and and turn it in various directions so that the paint flows in the direction that the pot is bent in. This creates and abstract design.

Tuesday, July 24, 2012

Sunni undalu

 Mom is visiting us and we have an abundance of sweets to eat. But my favourite has always been sunnundalu, made with urad dal.This is a simple but delicious recipe.


 For these you will need

 Urad dal (Blackgram) - 1 Cup
 Powdered Sugar - 1 Cup
 Elaichi (Cardamom) powder - a pinch
 Ghee (Clarified butter) - 1/2 cup


Dry roast the urad dal in a heated pan until the lentils turn a coppery color and a beautiful fragrance emanates. Keep aside to cool. Powder the lentils and mix the powdered sugar and elaichi powder to this.

If you want the sweet to be crunchy make a rough powder, if you like the sweet to melt in your mouth, make a fine powder.

Now heat the ghee until it melts. Pour the hot ghee into the powdered mixture and make round balls. Melt in your mouth, delicious Sunni undalu are ready to eat.

Monday, July 23, 2012

Pisa, italy

  Of all the attractions in Italy, The leaning tower of Pisa can be considered a tourist trap. The number of people around you in peak summer makes it even difficult to get a good view let alone a good picture.

 Pisa is a city in Tuscany in Italy, although it is well known for the leaning tower of Pisa, this city has about 20 other historic churches , and quite a few bridges across river Arno. Pisa is directly connected to many of the main cities in italy by rail and road. There are three railway stations around Pisa, Pisa Centrale, Pisa Aeroporto and Pisa San Rossore.The nearest airport is the Farez Airport, which is an hour's drive from pisa.

The main attraction is Pisa is as mentioned earlier, the leaning tower of Pisa, which is within the Piazza dei Miracoli a walled area in Pisa. The four main components of the Piazza dei Miracoli are the Duomo (cathedral), the Campanile (the cathedral's free standing bell tower), the Baptistry and the Camposanto.The Piazza is mostly grassy with a paved way connecting the four edifices.


  The focus of the Piazza is the Duomo which is a cathedral, entitled to Santa Maria Assunta.


The campanile, or the bell tower is famously known as the leaning tower of pisa or the Torre di pisa. The tower leans about 3.99 degrees. This means that the top of the tower is displaced horizontally 3.9 metres. Most of the crowd who visit Pisa visit only to view this attraction. However the best time to see this is in the off season, or early in the morning to avoid the maddening crowds.

The baptistry is a religious building in the Piazza dei Miracoli. It is the largest baptistry in italy

The Campo Santo, also known as Camposanto Monumentale or Camposanto Vecchio is a historical edifice at the northern edge of the Cathedral Square. .


Once in Pisa take a few hours to walk around the town and visit the bridges and the other historic churches. Take in the beautiful italian buildings and have a meal at one of the laidback outdoor restaurants and enjoy the italian experience.

Sunday, July 22, 2012

At home Facial


 When I was younger, I used to follow this once a week routine, that left me with flawless skin. I got a little lazy as I started working and completely forgot about it over time.

 Those of you who want healthy skin, but don't want to spend time at a beauty salon, try this at home. And guys, this one works great for you too, this routine is not just for women. All the material you need to use is usually available around the house.

 To start off, use an apron or a towel to cover your clothes . Tie up your hair or use a hairband so it will not get in the way. Wash your face with a face wash and pat dry.

 Step 1 (Cleanse) -  Take a table spoon of milk in a bowl. Dip some clean cotton wool in the milk and apply on face and neck. Massage in circular motion for about a minute. Remove the excess milk with cotton and wash off with plain water.


Step 2 (Scrub) - Mix 1 Tspn Besan (Chickpea flour) with 1 tspn sugar , make a paste with rose water. Scrub your face with circular motions until the sugar melts. Wait till the Chickpea flour dries. Wash off with plain water. 

Step 3 (Steam) - Heat water with mint leaves and steam your face. Remove blackheads.

Step 4 (Tone) - Wrap an ice cube in a towel and rub on the face. Apply rose water on cotton wool and dab on face.

Step 5 (Mask) -
Oily Skin - make a pack of crushed fresh fruits. Massage on face.Leave till dry and wash
Dry Skin - Mash half a ripe banana, mix with 1 tspn honey and one tspn olive oil. Massage on face. Leave till dry and wash
Normal skin - Massage with milk cream, leave till dry and wash.

Step 6 (Mask 2) -
Oily Skin - Mix 1 tbspn, sandalwood powder with milk to make a paste. Apply evenly on face and leave to dry. Wash off with plain water.
Dry /Normal Skin - Mix a tspn of powdered Oats and powdered almonds. Mix with a tspn of milk cream. Make a paste. Apply evenly on face. Leave to dry and wash off with plain water.


This whole routine will take 30-45 minutes and gives you wonderful , glowing skin

Saturday, July 21, 2012

Cloud Computing - IaaS

 A couple of weeks back, I wrote about what Cloud computing is and we discussed a few examples of SaaS. Today I will talk about IaaS(Infrastructure as a Service)

 IaaS is the most basic of the cloud computing services. Putting it simply, servers are rented out to the users for virtual use. Computers are provided by the cloud service providers to the end user, to use sometimes as physical but mostly as virtual resources. The user runs these virtual machines as a guest using a hypervisor.

A hypervisor also known as a Virtual Machine Manager (VMM) is a hardware virtualisation technique that allows multiple operating systems to run concurrently on a host computer. Some examples of a hypervisors that are used in IaaS are Xen and KVM (Kernel based Virtual Machine).

The cloud computing service providers manage pools of hypervisors in order to manage to cater to a large number of virtual machines. Some more examples of Iaas could include songs in a virtual machine music library, file-based storage and IP addresses. VLANs are also one such example. A Virtual Lan is a group of hosts , that even though they might not belong to the same physical location, communicate with each other as part of the same broadcast domain.

The hypervisor pools are usually installed in data centers. From here the cloud service providers supply the required resources on demand. Mostly for the Wide area connectivity, the Internet is used. However, in some scenarios Carrier Clouds are used.

 Unlike SaaS, Cloud users have to install the operating system images along with the application software on their machines. Here it is the cloud user who is responsible for maintenance of the operating system and the software.

 Iaas services are typically billed on a utility computing basis. Utility computing is basically the packaging of resources as a metered service. The advantage is that there is almost no cost to aqcuire the computer resources, and the computational resources are rented.

 Some examples of IaaS include Amazon CloudFormation, Rackspace Cloud and Google Compute Engine

Friday, July 20, 2012

Movie Review - Golmal(hindi, 1979)

 I was watching this film called Bol Bachchan starring Abhishek Bachchan and Ajay Devgan. This pathetic attempt at comedy is supposed to be the official remake of the 1979 Amol Palekar starrer Golmaal. Golmaal has been a benchmark for comedy movies for years. Such subtle but hilarious comedy has not been seen in Hindi cinema for a long time now. I have decided to review a few Hrishikesh Mukherjee classics in my movie reviews.

  Let's start with Golmaal then. Golmaal was directed by Hrishikesh Mukherjee, written by Sailesh dey and had music by R.D Burman. In leading roles were Amol Palekar, Utpal Dutt and Bindiya Goswami. This film has influenced many a director working on comedies. The characters Ram Prasad Sharma and Lakshman Prasad Sharma(Lucky) from the film Main hoon na were tributes to the lead roles in Golmaal.

Ram Prasad Sharma, (Amol Palekar) is on the lookout for a new job and his uncle (David) suggests that he attend an interview with Bhavani Shanker( Utpal Dutt). Bhavani Shankar is a man of traditional and wierd tastes. He dislikes today's youth as they show more interest in music and sports and do not believe in hard work. To get the job Ram needs to

  • have a moustache
  • wear kurta pyjama
  • feign ignorance about sports and music
  • act traditional and conservative
Ram creates a fake persona at the interview and gets selected for the job as Bhavani Shankar is impressed with his values.  One day Ram takes leave from office citing his (dead) mother's ill health as a reason. He goes to watch a football match, where Bhavani Shankar sees him. In order to save his job, Ram lies that he has an identical twin, Lakshman Prasad Sharma , who has no moustache and does not have a job.  To save this story, Ram comes up with a string of lies and this leads to some hilarious scenes.

 Bhavani Shankar wants Lakshman to teach music to his daughter Urmila (Bindiya Goswami). Urmila and Lakshman fall in love, but Bhavani Shankar wants Urmila to marry Ram. When Bhavani Shankar who is impressed by Ram's values decides to meet his mother, they hire a socialite Mrs Shrivastav(Dina Pathak) to play the part.

This leads to more lies when Bhavani Shankar accidentally meets Mrs Shrivastav at a party and then she lies that Ram's mother is her identical twin. The scene which follows is the most hilarious one in the movie. Watch it here.

How Bhavani Shankar realizes the lies and how he has a change of heart forms the rest of the story.

Amol Palekar carries the movie effortlessly on his shoulders. His comic timing is amazing and his portrayal of the soft spoken Ram and impish lakshman is impressive. Utpal dutt is his usual self in the role of Bhavani Shankar. Dina pathak, Deven Varma , David and Manju Singh form a great supporting cast. Bindiya Goswami looks pretty but has nothing much to do. The music by R.D Burman is amazing, with songs like Golmaal and  Aane wala pal being popular to this day.

 Golmaal is an evergreen comedy with Hrishikesh Mukherjee's signature style. It is one of the films that I love watching over and over.

Thursday, July 19, 2012

Talent of the week - Swapna koganti


 When I started looking for talent to introduce on my page every Thursday, I realised I did not have to look too far. I'm surrounded by such wonderful and talented people.

Today's talent is Swapna Koganti. She is a dear friend and a published author. Her first telugu book, named 'gajugayi' was released in 2010. Swapna is a software engineer by profession and a writer at heart.

 Gajugayi is the story of Swapna's maternal grandmother Anasuya. The story captures her journey from an innocent little girl to a determined woman. I will mention more about the book in one of my book reviews.

 
The cover page of Gajugayi
Swapna believes todays generation though talented has no time to understand and follow the values and ideals of the past and we barely know about many traditions. She wanted the world to read about her grandmothers life, so they would know the importance of education and sticking to values in one's life.

 Swapna is a voracious reader and loves to write. She hopes to run a magazine of her own someday. She is a keen observer and we can notice this in her writing style. Let's hope this multi talented writer comes up with more such wonderful books. Here's wishing her all the best.

P.S - I know I did not do justice to Gajugayi. I am saving it for the book review :)

Wednesday, July 18, 2012

The lost painting

 Today's post is about a painting I had left in our old apartment while moving out. I did not realize it until a few months later.


 While we were living in Tampere , it was the peak of winter and we couldn't go anywhere because of the snow. So, I took to painting. Acrylics have always been a favourite medium for me.

 I started off with this pre primed stretched canvas. I wanted to paint a face, but I had never done it before. Took me a couple of hours to finish this one.

 I started off with tracing out the outline of the face on the canvas, I filled the face with the flesh tint that I mixed (I do not use ready made flesh tints). I used a combination of, white, cadmium yellow, cadmium red, and raw umber for the base colour. MY brush strokes normally don't go in one direction, but this painting required that I run the brush in the shape of the face. Pretty much like applying make up . Once the base coat dried, I mixed a smidgeon of prussian blue in the flesh tint and dabbed wherever the shadows were required (The neck, chin etc)

 Next I painted the lips in a combination of cadmium red and white. Instead of shading the lips, I created an outline with cadmium red, which created an illusion of shading.

 Now the eyes were the most difficult part to paint. The base coat, though looks like it, is not white. It is white with a slight mix of gray. Once the base coat dried, I painted the pupil and the iris with two shades of gray, lighter on the outside, darker on the inside and a dab of the lighter shade on the center. I drew the eyelashes with the tip of a  fan brush and used the same strokes I would use while applying mascara.

Before I painted the hair, I wanted to paint the background as it would be difficult to paint the background after details are in. I painted a gradient of blue and green as the background. Not much care was given to the brush strokes.

 After the background dried, I started painting the hair. I wanted the hair to reflect the coor of the skin and did not want it to look artificially black, So I mixed a little dark brown in what remained of the flesh tone. I wanted the hair to have a flyaway look, so the strokes went down from the top of the head and outward. I did not measure the placement of the eyebrow properly , hence the surprised expression :).

 Finally, I ended the whole thing with a Yellow/blue/ brown frame to highlight the face and some jewelery in the colors of the background.


Tuesday, July 17, 2012

Idly, sambar and coconut chutney


Delicious Idlis  with sambar and coconut chutney
 Last week we discovered an Asian store in our neighbourhood. I ended up buying a small bottle gourd and fresh coconut among other things. So, hubby wanted me to make sambar and coconut chutney with the idlis I was gonna make for breakfast. I use my mom's recipe to make sambar, and usually tastes great, but this time it was totally out of this world.  I thought I'd share this recipe with all of you.

You will need :


For the Idli batter:


  • 1 cup urad dal (black gram /black lentil)
  • 2 1/2 cups idli rawa
  • 1 tsp methi seeds (fenugreek)
  • 1/4 th cup flattened rice(Poha)
  • Salt to taste
  • Baking soda - a pinch

For the sambar :


  • 1/2 cup Toor dal (yellow pigeon peas)
  • Tamarind, the size of a lemon
  • 2- Onions, roughly chopped(if you can find spring onions,chop and add them along with onions.)
  • 2- Tomoatoes , roughly chopped
  • Vegetables, cut into bite sized pieces (I usually use drumstick, ladies finger, raw mango, bottle gourd, brinjal, whichever is available)
  • Curry leaves
  • Cilantro / corriander leaves , finely chopped
  • Mustard seeds 1 tspn
  • Dry red chilies - 2
  • Hing / Asafoetida - a pinch
  • Oil/ghee 1 tbspn
  • Green chillies - 2 slit horizontally
  • Turmeric powder - 1 tspn
  • Salt- to taste
  • Red chilli powder - to taste
  • Sugar 1 tspn


For the sambar powder:

  • Chana Dal (dried, split chickpeas)- 1 Tbspn
  • Corriander seeds (Dhaniya) - 1 Tbspn
  • Jeera (Cumin) seeds - 1 tspn
  • Dessicated coconut 1 tspn.
  • Ghee / clarified butter a few drops

For the coconut chutney:

  • 1/2 Cocunut cut into pieces
  • 2 Green chillies
  • 1/2 inch piece of ginger
  • Mustard seeds 1 tspn 
  • Dry red chilli 2
  • Oil - 1 tspn
  • Salt

The Process:

Idli:

Clean and soak the Urad dal and Methi seeds for about 5 hours. In a seperate container, soak the Idli rawa and Poha for approximately 2 hours. 


Grind the Urad dal and methi seeds to form a foamy and soft texture, now add the idi rawa and poha mixture to form a fine and frothy paste. Take this mixture in a container, add baking soda and leave overnight for the batter to raise. Mix with your hand to initiate the fermentation process. Read the details for fermentation in my post about Dosa batter


 Once the batter is fermented, it will rise to double the quantity. Now grease the idli moulds with oil / ghee and add the idli batter to each mould. Make sure you do not fill the mould to it's full as the idli will rise after steaming. Pressure cook for 15 minutes.


 Serve hot with sambar / chutney


Sambar:

Sambar is a staple in many south Indian homes. Though making sambar is an elaborate process, it can be done fairly quickly once you get used to it.


Soak the tamarind in warm water.  

Boil  the Tur Dal along with a little turmeric and salt. Drain the excess water and grind the dal in a mixie or mash it until it is a pulp. Keep aside


Heat a  little wok and add a few drops of ghee to this. Roast the ingredients for the sambar powder until a lovely aroma arises from it. Take off the heat and leave to cool. Once cooled, grind into a fine powder and keep aside.


In a large container, add a tbspn of oil. Add the mustard seeds and allow them to splutter, add the curry leaves and Dry red chilies. Once a nice smell arises add the Asafoetida and immediately add Green chillies and onions and stir quickly. Do not let the Asafoetida burn. 


Once the onions become transparent, add the chopped tomatoes, stir and reduce the flame. Cover and et simmer on a low flame for 2 minutes. Now remove the lid and add the remaining vegetables, stir and cover again. Let the vegetables simmer on a low heat for 3-4 minutes.


In the meantime, prepare the tamarind pulp by mixing the soaked tamarind in water. remove the solid tamarind and keep the pulp aside.

Now remove the lid of the container and  add the mashed dal , stir once and add the tamarind pulp. Mix well. Now add salt, turmeric and red chilli powder and the sambar powder, stir well. Add 2 cups of water and cover and cook on medium for 5 minutes.


 Remove the lid, add sugar and sprinkle chopped corriander leaves. Bring to a boil , Cover with llid and continue simmering for another 10 minutes. Sambar is ready to serve. Tastes great with rice, idli, dosa. 


Coconut chutney: 

Coconut chutney
Chop the coconut and grind into fine paste along with the green chillies and ginger.


Heat oil in a pan , add mustard seeds and allow them to splutter. Add curry leaves and red chillies. Once chillies change color, remove and add the mixture to the ground coconut chutney. Add salt and mix well.


This chutney goes well with idlis, Dosas and vada.


Wednesday, July 11, 2012

Painted Coffee mug


 Don't you just love drinking coffee? Nothing beats a warm, comforting mug of coffee on a cold day. I love gifting coffee mugs to friends, they are so utilitarian and decirative at the same time.
One such mug I made for a friend, is todays topic. This one is more on the decorative side.

 I wanted to present a coffee mug to a friend of mine who loved going on looong coffee breaks. His name started with S so I decide to paint his initial on it.

 To paint on a mug, you need to clean it really well to remove finger prints and any traces of grime. I usually use acrylic or fabric paints to paint on ceramic. These days there are also ceramic paints available, which can be baked in an oven to make them dishwasher and microwave proof.

I first painted his inital on the mug, but felt it was too simple. Then i added a few dots to the sides. These reminded me of bubbles and I tried to give it a coral theme. I rummaged through my mom's shell and bead collection and found some really beautiful shells.

 The thing with ceramic is that it is difficult to stick anything to the smooth surface. I used epoxy putty to stick the shells to the mug. You have to be very quick as epoxy putty hardens very quickly. Once the shells were stuck to the mug , I painted them in bright colors. I used pearl fabric paint for this. On the mug I painted a few weeds all around.

I waited a day for the mug to dry , just in case and Voila, a beautiful, coral themed mug. Try not to use water or oil colors because they will not adhere to ceramic. Another technique that I often use is duct tape stencil. I wrap the mug in duct tape to form a random striped pattern. I dip a sponge in color and dab it on the mug. This gives the mug a geometric pattern with a unique texture. You can also use paper, knives or dry brushes to give unique textures. If you want it to look more girly or decorative, sprinkle a little glitter on the wet paint or outline the pattern with glitter.

 Have you ever painted on ceramic? Do share your pictures.

Tuesday, July 10, 2012

Plain Paratha with Kaleji (Liver) Masala


One of the first non- vegetarian dishes I learnt to cook after getting married, was kaleji masala. The first festival after our wedding was bakrid. It was only a couple of weeks since we were married, and hubby told me that this is a traditional dish made every Bakrid and is usually the first meal of the day.
A quick phone call to M-I-L and I learnt how to make this delicious dish.


 You will need:


 For the Paratha:

Whole wheat flour 2 cups
A pinch of salt
1 Tbspn oil/ghee/clarified butter
Water

For the Kaleji Masala:

Goat liver, cleaned and cut to bite sized pieces 1/2 kg
Onions 2, finely chopped
Ginger Garlic paste 1 tspn
Green paste being made
Chopped Corriander leaves 1 cup
Mint leaves 1 cup
Green chillies 4-5
Pepper corns 8-10
Salt to taste
Yogurt - 1 cup
Red chilli powder 1 tspn
Turmeric powder - 3/4th tspn
Oil 2 Tbspn

The method :


Parathas


Mix together the flour, water and salt, knead to form a soft, pliable dough. Keep aside for 20 minutes. Divide the dough into 15 portions. Using a rolling pin, roll out the portions into small thin rounds (roti). Spread a drop of oil on half the circle and fold it into a semi circle. Spread another drop of oil on half of the semi circle and fold it into a triangle.
Sprinkle a little flour on a plain surface and roll out the triangle evenly on all sides. Heat a pan and bake the paratha until it's evenly done on both sides. Little brown dots should form on both the sides. Apply a little oil while Baking. Serve hot with Kaleji masala

Masala

Marinate the goat liver with, salt, red chilli powder, yogurt, ginger garlic paste and turmeric powder for about about 2 hours.
Grind the green chillies, pepper corns,mint leaves and corriander leaves to form a paste. Keep aside.
 Heat oil in a pan and add the chopped onions. Stir until the onions start to brown. Now add the marinated liver to the pan. Cook until it starts to ooze oil. keep stirring in between. Now add the ground green paste, to the cooked meat. Cook on a low heat until all moisture is evaporated. Some more yogurt can be added if moisture is lost before the liver is cooked. Remember not to add water.

Plain paratha with Kaleji Masala


Monday, July 9, 2012

Secunderabad - My city


 Many of you must have heard of Hyderabad, the IT hub of AP and the home of the Charminar. I wonder how many people have heard of the twin city to Hyderabad.

 Secunderabad, popularly known as the twin city to Hyderabad, was named after Sikandar Jah, the third Nizam of the Asaf Jahi dynasty. It was founded in 1806 AD as a british cantonment. The city is geographically seperated from Hyderabad by the Hussain sagar and the Tank bund.Together with Hyderabad, this forms the sixth largest metropolis in India. It is also one of the largest cantonments in India and has a major presence of the Army and Airforce.

 Since secunderabad was under the rule of the British, the atmosphere here is slightly different from the nizami culture of Hyderabad. Sangeet cinema is one of the popular thetares where only western movies were played. The Secunderabad club is a very popular club that is established at a country house gifted by Salar Jung 1.

 On moving towards the Army areas, we can see the Tirumalgiri (trimulgherry) fort. Built in the year 1867, this fort is now used as a military hospital. It is surrounded by a a deep channel that stands at an elevation of 3 miles.

Not far from here is the Victorian prison which was used as a confinment center since the victorian era. It still has an eerie look about it.

The Rashtrapathi Nilayam serves as the office of the President of India during his visits to Hyderabad.

For the Religious there are many places to visit. The Ujjaini Mahankali temple where the bonalu festivities happen every year, the Ganesh temple and Hanuman temple are quite famous. The Moula - Ali Dargah is definitely worth a visit. This dargah lies atop a hill and is one of the 11 heritage conservations sites recognised by HUDA. St Johns church is the oldest church in secunderabad, St. Marys church is quite well known too.

 If you are in the city during the national holidays , then watch out for the parade, in Parade grounds. The adjacent Gymkhana grounds also house a fair/ exhibition for a part of the year.

 If you have time on your hands, head out to the nearby shamirpet lake where you can find, the NALSAR and BITS, pilani campuses. The beautiful lake at Shamirpet is a very nice picnic spot. This lake attracts many birds and is a good place for birdwatching. Also nearby is the Jawahar deer park, which is maintained by the Government of India. This park houses many deers and peacocks. On the way back you can visit the beautiful Ratnalayam temple.
Ratnalayam   


Also worth a visit is the Ananda Budhda vihar, a budhist monastery near Mahendra hills. This is a beautiful place to meditate, but I visit this place for the serene view.

The shopping enthusaists can visit James steet, General Bazar or Monda market. These places offer wares for every pocket.


Sunday, July 8, 2012

Breathing right

If you woke up breathing, congratulations!  You have another chance.  ~Andrea Boydston

 Breathing is something we all do unconsiously, it requires no effort or concentration from our end.  However, if we breathe in a shallow manner, not much good can come out of it. Right breathing can help us reap benefits both physically and mentally.

 Most people only take shallow breaths. What happens in such scenarios is that , the stomach is pulled inside and the shoulders are pushed up to allow the air in. This is too much effort, breathing is natural and should be done naturally. Shallow breaths also reduce the oxygen levels in the blood and this might lead to tension, exhaustion and many stress related illnesses. 

 The effort many people make to suck in their tummies also leads to breathing problems.  There are many vital organs in the abdominal area which get affected on tucking in your tummies too long. 


 It is good to know that unlike your heartbeat and digestion, breathing is one bodily function that you can control. Many cultures have breathing exercises and routines that help calm the mind and improve health. One of many such practices is Pranayama, which many people call Yoga breathing. 


 Experts say one good way to breathe right, is to notice how you breathe when you are happy, relaxed or when you exercise. This kind of breathing can be emulated always. The right way of breathing is to breathe from the diaphragm. If your breathing is correct, then you can feel your diaphragm push down in to your belly. 

Deep breathing is the best way to relax your body. When you take shallow breaths, you send indications to your brain that you are under stress. Deep breaths oxygenate every cell in your body. 

 Apart from the reduced stress , deep breathing exercises can also induce weight loss. Most of my Indian readers must have seen various pranayama  exercises on television, early in the morning. These techniques work wonderfully for weight loss if practiced regularly. Do remember that like any other exercise, it is no miracle and will take time. Start with 1-2 minutes a day and slowly increase to 20 minutes. Exercise forms like Pilates, Yoga and Tai-chi also concentrate on right breathing along with physical movement. 


For those who do not find the time to practice various deep breathing exercises, a few minutes of diaphragmic breathing can produce amazing results. Also, deep breathing exercises are quite useful to wind instrument players and singers and others who use their voice more often. 


 Try deep breathing for a healthy life. If you have any ailments, please consult your medical practitioner before taking upon any such activity. Have you benefitted from deep breathing? Please share your experiences.


Friday, July 6, 2012

Book Review - The fourth protocol

Yes, I did promise to review movies and video games too, but books have always been my first love. Today I wish to review a book, that is as old as I am. I came across this book about 10 years ago and was engrossed in it within moments of opening it. My copy was missing the first twenty or so pages, and yet, I felt the book was gripping.


 The Fourth protocol by Frederick Forsyth has been one of my favorite books for a long time. The title refers to the fourth protocol of the nuclear non-proliferation treaty(NNPT) of 1968. This protocol prohibits the delivery of nuclear weapons into any of these countries other than being dropped off aircrafts or on ballistic missiles. This also meant prohibition of assembling a nuclear device close to target before detonating it.
The book picks on real life treaties and workings of the government both within Russia and Britain. It also highlights the involvement of spies and secret service agents on both sides. The central plot of this novel is plan Aurora, hatched by the British master spy Kim Philby at the behest of the general secretary of the Soviet Union. Aurora is put into motion in order to ensure a labour party victory in the coming general elections in UK. Russian agent Valeri Petrofsky is undercover in England and collects all the parts of the nuclear device which are smuggled in as harmless packages. An unforseen incident with one of the couriers brings to light the plot and a search is on to find petrovsky and foil the plan.

At the beginning of the novel, a burglary happens in a senior civil servants house. A few top secret documents are also stolen along with other things. The notorious thief , Jim Rawlings has a patriotic side to him. He sends the documents to MI5 when John Preston investigates them. This leads to a discovery of spies in the guise of diplomats. During his investigations, John finds out about the smuggled parts of the nuclear device and tries to capture the perpetrators. It is upto John and his team to prevent the "accident" that could change the face of British politics forever and trigger a collapse of the Western alliance.

The fourth protocol is an eventful thriller involving espionage, deceit and treachery. Though the plot has many twists and turns, this book is not for those who love fast paced thrillers. The book involves a lot of descriptions on international relations, politics, covert operations and government administration. These do slow down the plot at certain times. The ten page report by philby might even put some to sleep. 
But, if you can brave these parts, this is a gripping spy thriller. The fourth protocol was also adapted into a movie of the same name starring Pierce Brosnan and Micheal Caine. 

Thursday, July 5, 2012

Talent of the week - Ramamani


 When I started this blog, I thought I would introduce new talent. But, the talent I am going to introduce is not new at all :).
She has been a music teacher for more than 30 years , having trained more than a 100 students. Our talent for this week is Ramamani Gujjari - My mom :).

 Ramamani was trained in south Indian classical music at the Maharaja college in Vizianagaram dist, Andhra Pradesh, India. She is proficient in playing the Veena as well.

 Being raised in a family that has a strong affnity towards arts, she also decided to learn painting and machine embroidery. Over the years she has mastered quite a few crafts and teaches them to young students at her art school, Toolika Institute of Arts, in Hyderabad.

A Machine Embroidered picture


 She was well known for her 'bommala koluvu' in the town of Kakinada where she lived for about 10 years. Every year was a new theme , and the settings and the dolls were all hand made.

 She believes there is no end to learning and never tires experimenting or learning new crafts. Some of the classes she takes at her institute are, Fabric/ Oil /water colour painting, Glass painting, Quilling, craft classes for kids, Hand Embroidery, pot painting, Decoupage, Pencil sketching. Embossed painting, Satin ribbon work, Faux Tanjore painting, Tie n Dye, Acrylic painting. This is apart from the Vocal and Veena classes.

Some of her works

Wednesday, July 4, 2012

Craft of the day - Quilling

Have you ever heard of filigree? It is the art of intricately carving silver to form elegant decorative silverware. However, Silver is not very affordable and it is not something you would want to easily experiment with.

Quilled Flower
 Try paper filigree or Quilling as it is usually called. Quilling involves turning paper strips into intricate art forms. The strips of paper are rolled, shaped and  glued together to form decorative designs. The paper is wound around a quill to create a basic coil shape. The paper is then glued at the tip and these shaped coils are arranged to form flowers, leaves, and various ornamental patterns.

Paper Quilling was introduced during the renaissance in France. The nuns would use gold gilded paper and roll it into decorative art forms instead of the more expensive gold filigree.

Quilling Basic shapes
A quilled flower bouqet
 Quilling paper is cut into strips and rolled into shapes as in the picture. These basic shapes are then put together to form designs. You can use these shapes to create flowers, 3D models of animals, jewelry, even landscapes.

There are various types of paper available for quilling in the market. Some papers usually used for quilling are Acid free, graduated and two tone graduated quilling paper. Essentially any paper that is thick enough to hold its shape after rolling can be used. These days pre-cut colored paper is also available. 


Have you ever tried quilling? Do share your work with me . Here is something made by my mom. 

A Quilled Rooster
Image source : wikipedia

Engagement Ring Tray


 Since I was a child, I had an affinity towards scisccors and glue. I would cut papers, staple them, paint on them and always end up making something out of it. Creating stuff by myself always gave me a high. From origami to jewelry making, I had tried it all. Making little trinkets or gifts for friends was an everyday thing.

 One crafter friend of mine had a deal with me. You make my engagement ring tray and I'll make yours. I made hers, but she could never make mine as I did not have an official engagement.

The engagement tray


  While browsing the net one day, she saw an exquisite engagement ring tray made with shells and wanted something similar. A couple of days before her engagement I visited quite a few stores and picked up a few plain trays. The green tray got the green signal from her.

 I found this little embellishment which I thought was perfect for the tray. A little stattuette of a girl and guy about to be wed. I used it as the centrepiece of the tray. However, the colors on the litle dolls did not suit the tray. That called for a paint job. I painted the girls lehenga turquoise and the guys turban to match it. Then gave a fresh coat of paint to the guys sherwani, to match the shells. I used acrylic pearl colours for most of the painting. I placed the dolls on a platform of shells and used a discarded spring to add a little glitz to the focal point.

 Apart from the ring, a pair of earrings and a necklace was also being presented, so niches were created for them using the shells. Once all this was done, I added a few star spangles and used transparent, glitter nail polish to fix them in place (Could not find anything else on time )

Voila! The engagement jewlery tray! Though the design idea was mine, I must mention my mom who put in a lot of effort on this tray. I could not give it all my time as I was leaving for Finland the next day.

Tuesday, July 3, 2012

Mirchi Bajji

  Call me weird , but the first thing I can think of when someone reminds me of monsoons in India , is food. Hot, piping, spicy fritters (pakode, bajji) or chaat. I don't like drinking tea , but most people say a hot cuppa along with these snacks lifts up your spirits on a rainy day.

 Our second recipe for scrumptious tuesday is Mirchi Bajji (Jalapeno fritters). I am pretty sure most of my Hyderabadi readers are longing to have a bajji while reading this post. There are different fillings used in different parts of India, I will only cover the basic version today.

For this recipe you will need

For the batter :

Besan (chickpea/gram flour) 1 cup
Ajwain (carom seeds) 1/4th tea spoon
Salt to taste
Baking soda 1/2 tspn

For the stuffing:

Jalapeno peppers / big green chillis 8-10
Tamarind pulp , the size of a lemon
Ajwain (Carom seeds) 1 1/2 tspns
Salt to taste.


The Method

Soak the tamarind for about 20 minutes. You can also heat it in a micowave for about a minute if you are in a hurry. Keep this aside to cool

In a bowl mix together all the ingredients for the batter . Keep adding water to this mixture until the consistency is right. When the Chilli is dipped in the batter it should coat completely. Make sure there are no lumps in the batter. Keep aside

In a blender mix together the tamarind pulp, Carom seeds and salt.

Slit the chillis lengthwise without seperating the crown. De seed the chillis with a spoon. Now stuff the chillis with the tamarind pulp mixture. Keep aside for a while. This will ensure that your chillis are not very spicy. If you want them hot, you can fry them right away.

 Heat oil in a deep pan . Once the oil is the right temperature , we start frying the chillis. To test the heat of the oil, drop a little batter in the oil, it should sink to the bottom of the pan first and then slowly rise up. If it rises up immediately, then the oil is too hot. Now dip the stuffed chillis in the batter and drop in the oil. Fry on medium heat until golden brown. Remove on to a paper napkin when done, to remove excess oil.

Serve hot with finely chopped onions and tomato sauce.


Masala Dosa and Chutneys


 Dosa! The favourite breakfast of every South Indian. We had a few guests over last week and they were very curious about how dosas were made. This scrumptious tuesday, I share with you my Recipe for Masala Dosa along with two chutneys. Onion and Groundnut.

 The Dosa is a savory crepe or pancake made with lentils and rice. It is one of the staple breakfast meals in south India and is equally loved every where else.

Do remember that for the batter, different people have different measurements. Experiment with the ratios to see how you like you dosa.

You will need: 

For the Batter

  • 2 Cups Rice
  • 1 cup Urad dal (Black gram)
  • 1/2 tsp fenugreek seeds (methi)
  • Salt to taste

For the Masala

  • 2 potatoes, Boiled and mashed
  • 3-4 green chillies
  • 1 medium onion finely  chopped
  • 1/2 tsp turmeric
  • Salt to taste
  • 1-2 tsp cooking oil
  • Finely chopped corriander leaves
  • Finely chopped ginger 1 tspn

For the Onion Chutney

  • 2 Large onions roughly chopped
  • 1 Tbsp corriander seeds (dhaniya)
  • 2 Dried red chillies
  • Salt to taste
  • a little jaggery
  • Tamarind , the size of a gooseberry
  • Oil 1 tspn

For the Groundnut Chutney 

  • 1/2 cup ground nuts
  • 2 green chillis
  • 2 garlic cloves
  • Tamarind, the size of a lemon
  • salt to taste
  • curry leaves
  • Oil 1 tspn


The Procedure

The batter

Soak all the ingredients except salt for at least six hours. Grind to a fine paste, add salt and water. The batter should be a runny consistency. Keep this batter aside to ferment for a few hours / overnight. I live in a cold country so I leave the batter next to the radiator to ferment.

The Masala

Heat oil in a pan, add the green chillies and the ginger. Stir until lightly fried, now add the chopped onions. Fry until transparent. Now add the mashed potatoes and mix well. Finally, add the salt and turmeric and stir until the potatoes are well done. Top with finely chopped corriander leaves. Take the pan off the heat and leave aside to cool

Onion Chutney

Onion chutney is one of my favourites. My mom used to make this both with idlies and dosas. It is a healthy chutney and helps cool the body. Heat a little oil in a pan and add the chopped onions. Fry until transparent. Add the remaining ingredients except jaggery. Fry until the onions are firm but well done. Make sure the corriander and chillies do not burn. Take off the pan and leave aside to cool. Add a little jaggery to this mixture and then grind it to a fine paste. Serve at room temperature

Groundnut Chutney

Groundnut chutney is a very very delicious chutney and tastes amazing with dosas. It is a favourite with my husband. Heat a little oil in the pan and add all the ingredients. Keep stirring until you can smell the fried peanuts. Take care not to burn anything. Take off the heat and leave aside to cool. Grind the mixture to form a fine paste.

The Dosa


Heat a flat pan /skillet. Make sure that the pan is well heated before you start or else the dosa might break.

Sprinkle a little oil on the pan. Now scoop a ladle full of batter and spread on the heated pan. Start from the middle and spread outside in a circular motion.
Take a spoonful of masala and top it on the dosa. One the Dosa is well done (Brown on one side) , remove it from heat , fold it it half and serve with the chutneys.

Tips:

  • Rub a piece of onion on the pan after every dosa, this keeps the pan non sticky.
  • I always use very good quality non stick pans. This way I can use less oil and the food is healthier.
  • For a brown dosa, use more oil.I don't add much oil, so my dosas are white.

I love eating Dosas on weekends. I hope you try this recipe and enjoy.